

I want to show you: How To Correctly Export Your Projects For a Mixing Engineer In Reaper
I know. You are probably in that point.
You finished already your song or, even better, your album. And it’s time to send it to your music producer to mix and master.
But wait, now what? You have no idea how to do it correctly. You may think: How the most very professional producers do this? Don’t panic, I am here to show you how.
Table Of Content:
01 Name Your Tracks
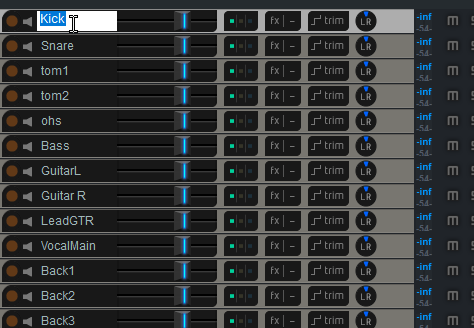
The first step, name your tracks! Very important if you wanna have an organized project.
It’s also a big help for the producer that is going to mix your song. Specially in terms of time. Imagine being you, the one with a project of 100 tracks with no names. It is a nightmare.
02. Render selected tracks
Render is basically to turn all into sound. So you will “eliminate” the VST’s, Virtual Instruments, plugins in general, and you will have all your tracks ready mix avoiding overload your PC.
In second hand, Engineers don’t usually accept projects with midi tracks without the sound you choose in your project. You need to “print” it and send the sounds.
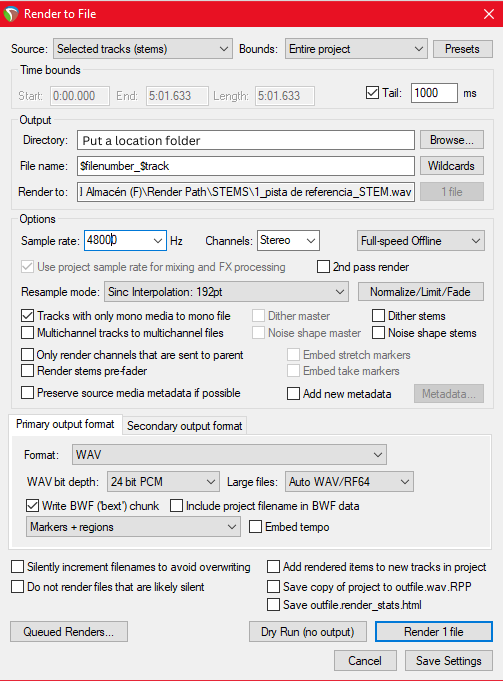
Follow these steps :
- Select all tracks (CTRL+A)
- Go to File
- Render
- Select from the list “selected tracks”
- Put a directory folder
- Press wildcards
- Add “filenumber”_”track”
- Add Markers and regions
- Use my configuration (Image below)
- Render file
03. Export The Midi Project (optional but important)
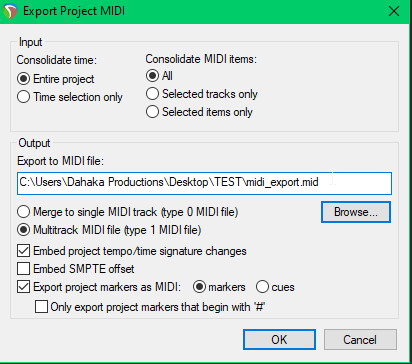
When you do that, you will create a midi file that contains all the important information of your project as: Tempo, Markers and midi notes. And not just the general tempo, but also the changes you made during the song.
You can see how significant it could be for the producer and also for you. So let start with the steps you may follow to do it correctly.
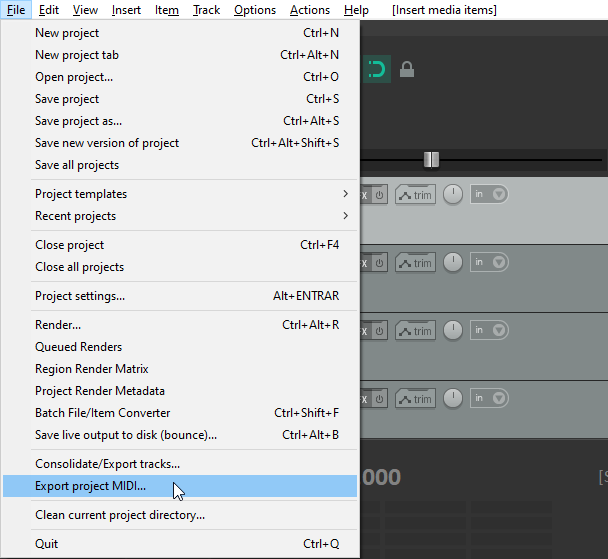
- Go to FILE
- Export project MIDI
- Copy my configuration (shown in the photo below)
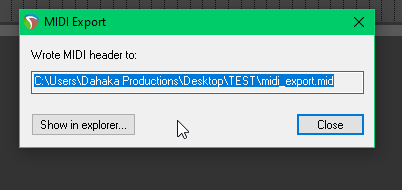
- Choose a folder where to locate it
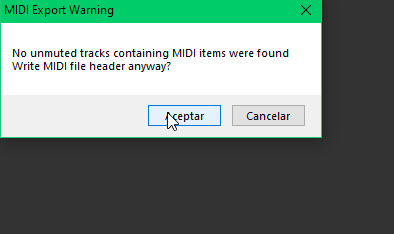
- If you see “no unmuted tracks blblbl”, just continue
- You can change the name of the midi file.
04. How to Send Your Exported Tracks
Once you’ve exported all your tracks, the next important step is to organize them properly. To do this, simply place all the exported files into a single folder. This will make it much easier to manage and send the files without any issues.
Once everything is in the folder, you can upload it to one of the following file-sharing platforms:
- Google Drive
- WeTransfer
- Dropbox
Simply share the link to the folder with me once it’s uploaded. This will ensure I receive all the necessary files in one easy-to-access place, ready for further processing.
I hope this tutorial is helpful for you. Please let any comment if you have doubts.
Also, feel free to reach me out if you need any service for music production. You can find here all I can do for you. Don’t waste time!
Don’t forget to visit my website of metal music production and take a look at different examples I produced.